


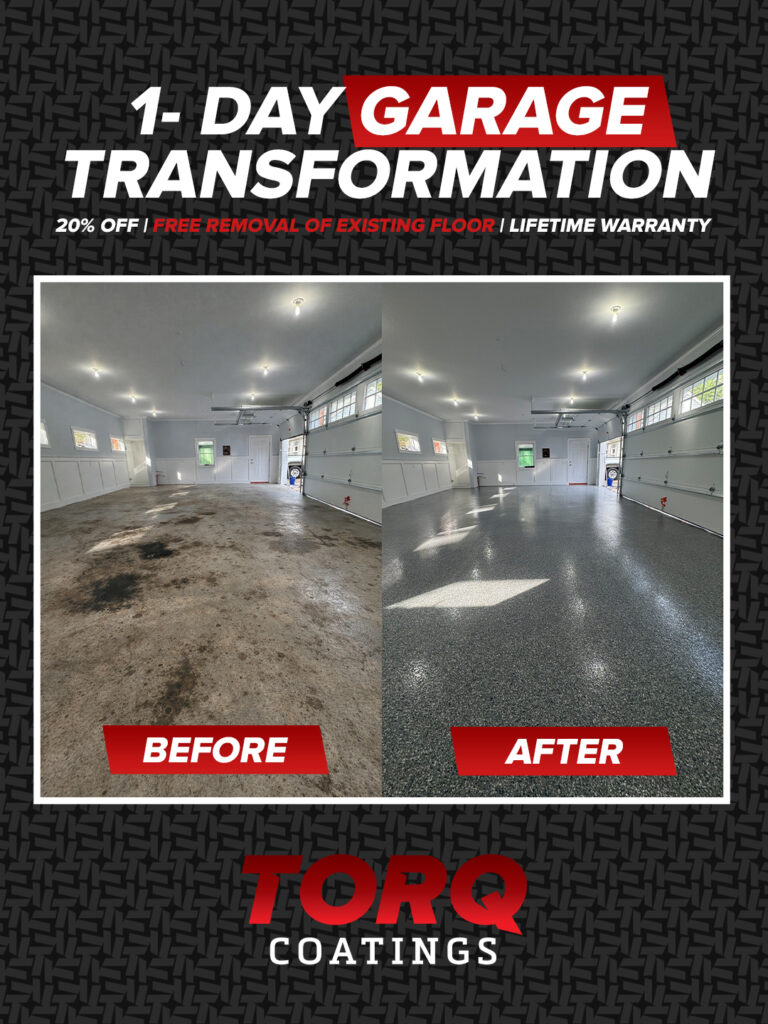
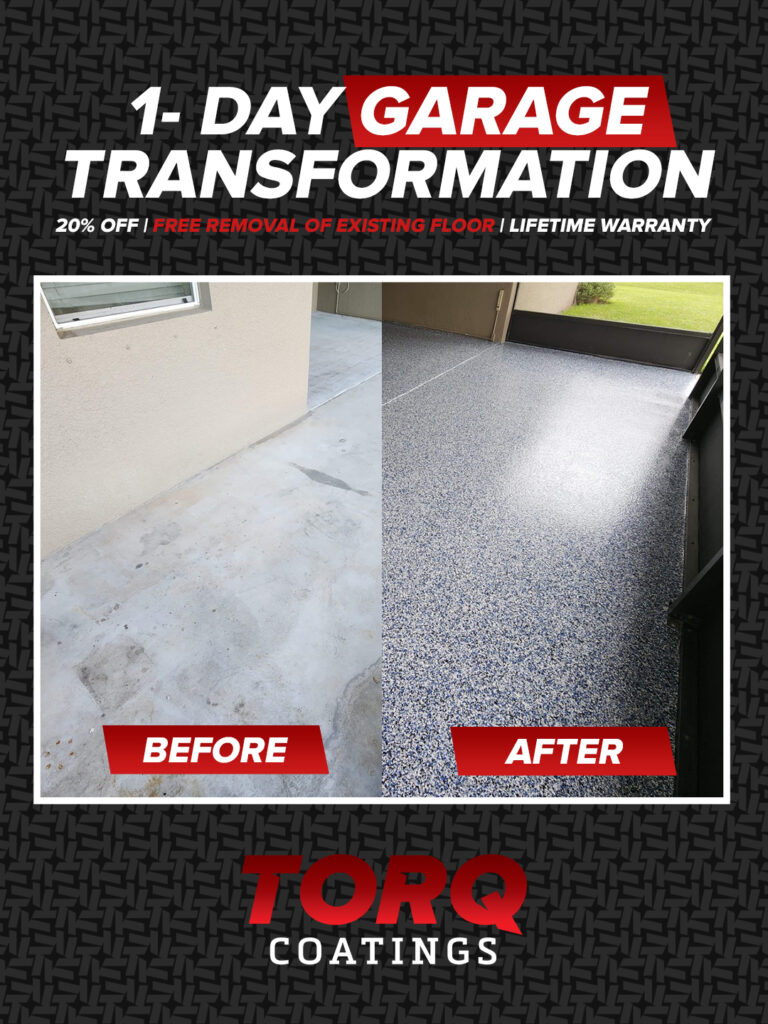
Quick Answer: Can a Damaged Garage Floor Be Saved?
Yes. A cracked, stained, or spalling garage floor can be professionally repaired and coated, unless the damage is extensive.
The process involves diamond grinding to remove damaged surface layers, filling cracks and spalls with structural repair materials, then applying a multi-layer polyurea, polyaspartic coating system that bonds permanently to the prepared concrete.
This approach costs 60-70% less than concrete slab replacement and provides a 15-25 year lifespan with proper aftercare.
The key requirement: Professional surface preparation. Over 80% of DIY coating failures happen because homeowners skip proper concrete repair and profiling.
The Problem: A Garage Floor Beyond Basic Cleaning
Many Chicagoland homeowners reach out to us, unsure whether their garage floor can be saved. In older garages especially, we often see a combination of damage types that make the concrete look beyond repair:
Freeze–Thaw Cracking:
Long cracks often run from the garage door toward the back wall. Midwest winters force moisture into the concrete, where it freezes, expands, and slowly breaks the slab from within. Each winter cycle widens the damage.
Spalling and Pitting:
The area near the garage door is usually the worst. Repeated exposure to road salt and melting snow causes the surface to flake and crumble. Over time, shallow craters form as the top layer of concrete deteriorates.
Oil and Fluid Stains:
Years of parked vehicles leave petroleum stains that soak deep into untreated concrete. These stains can’t be removed with household cleaners and permanently darken the surface.
Failed DIY Coatings:
Many homeowners attempt a store-bought epoxy kit before calling a professional. These thin coatings often peel or delaminate within a year when surface preparation is inadequate, leaving the floor in worse condition than before.
In many cases, homeowners are told the only option is full slab replacement, which can cost tens of thousands of dollars. What’s often overlooked is that with proper grinding, repair, and a professional coating system, severely damaged floors can still be restored without demolition.
Why Standard Epoxy Fails on Damaged Concrete
Many coating companies won’t touch a floor that is heavily damaged. They know epoxy can’t handle it. Epoxy is rigid. When concrete moves (and all concrete moves with temperature changes), epoxy cracks right along with it.
In Chicago, where we swing from -10°F in January to 95°F in July, that movement is significant.
Epoxy also requires excellent moisture conditions. Those white, bubbling spots you see on failed epoxy floors? That’s moisture pushing the coating off from underneath.
Multi-layer polyurea/polyaspartic coatings solve both problems. They’re flexible enough to move with the concrete without cracking. They’re also more moisture-tolerant during application, which matters in our climate.
Some contractors market fast installation processes, but speed means nothing if the prep work gets rushed. We’ve removed failed floors from other companies where they clearly skipped proper crack repair and surface profiling. Many use polyurea base coats that are prone to yellowing over time because they’re not UV-stable.
We take longer on prep because we know it’s the foundation of a lasting floor. We use aliphatic polyaspartic for UV stability. The result lasts decades instead of years.
The Solution: Professional Repair + Polyaspartic Coating
If you have a floor that needs repair plus coating, our process can likely fix it.
Step 1: Assessment (30 minutes to 1 hour)
We map every crack, measure spalling depth, and test for moisture vapor transmission using a calcium chloride test.
Step 2: Diamond Grinding (2 to 4 hours)
We use diamond grinders with HEPA dust extraction to remove the damaged concrete. This accomplishes three things:
- Removes previous failed coating (if any) and surface contaminants
- Exposes sound concrete for repair materials to bond to
- Creates CSP 3 surface profile (concrete surface profile) for new coating adhesion
This step separates professionals from DIY. Without proper profiling, no coating will last.
Step 3: Crack Repair (1.5 to 3 hours)
We rout out large cracks using a diamond blade, creating clean V-channels about 1/4″ wide and 1/4″ deep. Then we fill them with flexible polyurea crack filler that cures harder than concrete but retains slight flexibility to prevent re-cracking.
Small hairline cracks are filled with epoxy injection resin under pressure.
Step 4: Spalling Repair (1 hour usually)
We chip out all loose material back to solid concrete, then trowel in a 100% solids polyurea repair compound. This material cures quickly and can be ground smooth.
Step 5: Final Surface Prep (30 minutes)
One more pass with the grinder feathers the repair edges and ensures uniform surface profile across the entire space.
Step 6: Base Coat + Decorative Flakes (1 to 2 hours)
A polyaspartic base coat is applied at about 15 mils thickness. While still wet, we broadcast a blend of decorative flakes across the entire surface.
After the base coat cures sufficiently (about 45 minutes), we scrape off excess flakes.
Step 7: Top Coat Application (45 minutes to 1.5 hrs)
The final clear polyaspartic top coat seals everything in a high-gloss, chemical-resistant layer. We can include additives for slip resistance.
Why Polyaspartic Works Where Epoxy Fails
| Factor | Epoxy on Damaged Concrete | Polyaspartic on Repaired Concrete |
|---|---|---|
| Flexibility | Rigid, cracks with concrete movement | Flexible, moves with substrate |
| Moisture Tolerance | Fails above 85% RH | Works up to 95% RH |
| UV Stability | Yellows in sunlight exposure | UV-stable, no color shift |
| Cure Time | 3-7 days full cure | 72 hours full cure |
| Temperature Range | Fails below 50°F application | Cures to -20°F |
| Bond Strength | 250-300 psi pull strength | 400+ psi pull strength |
| Lifespan on Repaired Floor | 3-7 years before failure | 15-25 years when properly cared for |
| Hot Tire Pickup | Common complaint | Rare, only if improperly cured |
| Chemical Resistance | Good for mild cleaners | Excellent, resists gas/oil/salt |
The difference comes down to chemistry. Polyaspartic coatings are aliphatic polyureas with modified cure agents. They cross-link into a flexible, UV-stable matrix that can handle the stress that Midwest weather puts on the surface.
6 Damaged Garage Floor FAQs
1. Can you coat over existing cracks, or do they need to be repaired first?
Cracks must be properly repaired before coating. Any crack in the concrete will telegraph through the coating and eventually cause it to crack and peel. Coating over unrepaired cracks is a common cause of coating failure within the first year.
2. How much does it cost to repair and coat a damaged garage floor?
Repair and coating costs run $7–$13 per square foot in the Chicago area. A typical two-car garage (400–500 sq ft) ranges from $2,800 to $6,500 installed.
Compare that to concrete replacement at $20-30 per square foot ($8,000-15,000 for the same garage), plus several days of downtime while the new concrete cures.
Professional repair and polyaspartic coating delivers equal or better performance at 40% of replacement cost.
3. Will polyaspartic work on a floor with spalling and pitting?
Yes, after proper repair. Spalling (surface flaking) happens when water penetrates concrete, freezes, and breaks off the surface layer. We chip out all loose material, then fill the damaged areas with fast-cure polyurea mortar that’s actually stronger than the original concrete.
After the mortar cures (15-20 minutes), we grind it flush with the surrounding floor. The polyaspartic coating bonds to both the original concrete and the repair material with equal strength.
Skipping the repair step and just coating over spalled areas is a guaranteed failure. The coating will bridge over the voids temporarily, then collapse into them within months.
4. How do professional repairs differ from DIY crack filler products?
Store-bought crack fillers are latex or acrylic-based compounds that sit on top of the crack. They have minimal penetration and poor adhesion. They’ll shrink, crack, and fall out within a year.
Professional polyurea and epoxy crack repair systems bond to the concrete at a molecular level. We also mechanically prep the crack by routing it out, which gives the repair material more surface area to grab onto.
Professional repairs become part of the concrete structure. DIY fillers are just temporary patches.
5. Can you fix a garage floor that already had a coating that failed?
Yes. This is one of our most common projects. Failed coatings usually peel because of poor surface prep or moisture issues.
We diamond grind the entire floor to remove 100% of the old coating and expose fresh concrete. This also creates the proper surface profile for adhesion. If moisture were the issue, we would address it with moisture-tolerant primers or moisture mitigation systems.
6. How long will repairs last under a polyaspartic coating?
When done correctly, the repairs last as long as the coating, typically 15-25 years. The polyaspartic coating seals the repairs from moisture, road salt, and chemicals that could cause new damage.
The key is using proper repair materials (100% solids polyurea or epoxy compounds, not hardware store fillers) and creating a strong bond through surface preparation.
Get Your Damaged Floor Evaluated
Your cracked, stained, or spalling garage floor can be transformed. Professional repair with a durable coating costs a fraction of whole slab replacement.
TORQ Coatings serves Chicago and the surrounding Midwest with expert concrete repair and polyaspartic coating systems. We specialize in damaged floors that other contractors turn away.
Schedule your free damage assessment and quote.
Every quote includes moisture testing, detailed damage mapping, and a written repair plan with transparent pricing. No pressure, no gimmicks.
Most damaged garage floors we evaluate can be saved. Let us show you what’s possible.